Nested Virtualization (Windows 7 Host Running VMWare
Workstation 12.0 -> Ubuntu 16.04 LTS as a VM on VMWare WorkStation Running
KVM - working as a KVM Host - with Ubuntu 16.04 LTS KVM Virtual Machine as
Guest)
The Setup
Windows Laptop : Running Windows 7
Virtualization on Windows : VMWare WorkStation 12.0 (Hypervisor)
Guest VM on VMWare WorkStation : Ubuntu 16.04 LTS (this will run LINUX KVM Hypervisor)
Hypervisor on Ubuntu 16.04 above: Linux KVM
Guest on Linux KVM as KVM VM Guest: Ubuntu 16.04 LTS
Create a VM in the VMWare WorkStation
The VMWare WorkStation VM Properties are as below. The CPU properties are with Intel-VTX/AMD-RVI enabled.
 |
| VMWare WorkStation VM Ubuntu 16 Properties 2 CPU |
The other properties are as below.
These are the general properties
 |
| VMWare WorkStation VM Ubuntu 16 Properties General |
The VM is connected to VMNet2 which is a Windows 7 Bridged adpater in VMWare WorkStation and bridged to the Wireless LAN Adapter on the Windows Machine. The Wireless LAN adapater connects the Windows 7 host to the Internet.
 |
| VMWare WorkStation VM Ubuntu 16 Properties Network Connected to Bridged Wireless |
Other properties of the VM. This Shows the RAM assigned to the VM
 |
| VMWare WorkStation VM Ubuntu 16 Properties Memory and others |
This VM was allocated an Ubuntu Minimal Install 600 MB Ubuntu LTS 16.04 Media and Ubuntu was installed on the same.
Post install configurations are as below.
Logon to the Console of the VM after installation and run the following from the console. As this VM is on the VMWare WorkStation access the console for this VM using the VMWare Workstation
Login as normal user to console
update the repo list to be used by APT
apt-get update
In case the errors related to CD/DVD ROM as repo errors like below appear
E: Failed to fetch cdrom://Ubuntu-Server 16.04.1 LTS _Xenial
Xerus_ - Release amd64 (20160719)/dists/xenial/main/binary-amd64/Packages Please use apt-cdrom to make this CD-ROM
recognized by APT. apt-get update cannot be used to add new CD-ROMs
Fix the above error using the fix as
Edit the file /etc/apt/sources.list
to comment the CDROM lines
root@ansible:~# vi /etc/apt/sources.list
root@ansible:~# grep -i cdrom /etc/apt/sources.list
# deb cdrom:[Ubuntu-Server 16.04.1 LTS _Xenial Xerus_ -
Release amd64 (20160719)]/ xenial main restricted
#deb cdrom:[Ubuntu-Server 16.04.1 LTS _Xenial Xerus_ -
Release amd64 (20160719)]/ xenial main restricted
update the repos
apt-get update
Install APTITUDE Too
apt-get install aptitude
Install OPENSSH Server, this is not needed if OPENSSH server is installed during the Ubuntu 16.04 OS installation
apt-get install openssh-server
Start SSHD and Enable
systenctl start sshd
systemctl enable sshd
systemctl status sshd
Upgrade the entire system with the latest patches
apt-get upgrade
Install these packages : these enable the KVM Virtualization, install VIRT-MANAGER tool and install GNOME to allow to run the virt-manager GUI.
aptitude install gnome-core gnome-session gnome-session-bin
gnome-session-common libgnome-2-0 libgnome-2-0 libgnomevfs2-0 virt-manager
aptitude install aptitude search qemu-kvm libvirt
virt-install bridge-utils
Allow root user to do a direct SSH login to the server. Edit the file /etc/ssh/sshd_config as below. (Please note you may not need it also in some secure environments allowing root a direct SSH to the server may not be allowed)
root@ansible:/etc/pam.d# grep -i root /etc/ssh/sshd_config
#PermitRootLogin prohibit-password
PermitRootLogin yes
# the setting of "PermitRootLogin without-password".
root@ansible:/etc/pam.d#
Restart SSHD service
systemctl restart sshd.service
Allow Root user to direct login to the GNOME Desktop (Please note that again in secure environments this may not be allowed to do so)
Comment the line in the file /etc/pam.d/gdm-password to
allow the root user to login to the gnome. root login to gnome is disabled.
in the file /etc/pam.d/gdm-password
root@ansible:~# grep -i root /etc/pam.d/gdm-password
#auth required pam_succeed_if.so user != root
quiet_success
root@ansible:~#
Ensure that the systemctl default target is set to graphical.target
root@ansible:~# systemctl get-default
graphical.target
root@ansible:~#
Reboot the system here if needed. Once done the VMWare WorkStation Console for the VM will show the Ubuntu GNOME Login screen. You can login there and start the virt-manager from the applications.
 |
| GUI of VMWare WorkStation VM |
We are here using the MOBATERM connection to the VMWare WorkStatiom VM to access the virt-manager on this machine. This Ubuntu VM will be working as an KVM Hypervisor host on which another VM Will be created and Ubuntu will be installed on the KVM VM Guest.
Access the virt-manager using the MOBATERM
 |
| Mobaterm connection to VM to Open Virt-manager |
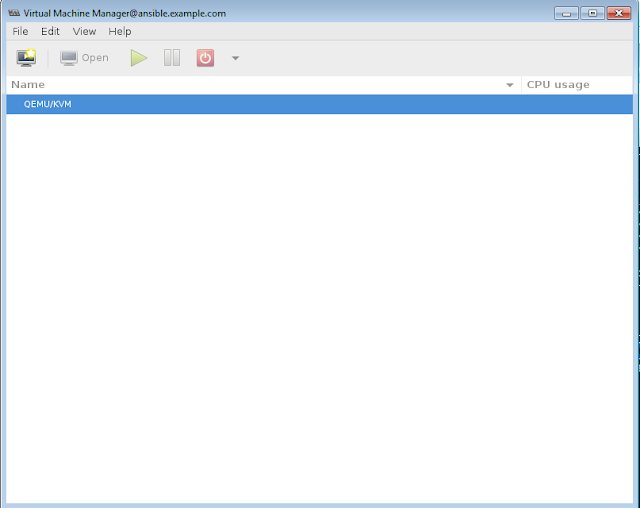
As soon as virt-manager starts, the virt-manager screen appears as
 |
| Virt-manager screen from Mobaterm |
In the virt-manager Create a new Virtual Machine Guest
 |
| Create a New VM in Virt-Manager Selection of Installation Media |
Assign the ISO for Ubuntu 16.04 OS installation.
Installation Medium is local ISO Image, the Ubuntu 16.04 LTS minimal install media ~600MB was copied to the desktop of the root user on the KVM Host
 |
| Create a New VM in Virt-Manager Selection of Installation Media ISO |
The ISO Image was browsed and attached here.
Also the below shows the CPU also RAM allocation to the KVM Guest
 |
| Create a New VM in Virt-Manager 2 Browse for the media |
 |
| Create a New VM in Virt-Manager (4) CPU also RAM allocation to VM |
 |
| Create a New VM in Virt-Manager (5) 10GB disk allocation |
Disk Allocation details to the KVM VM Guest
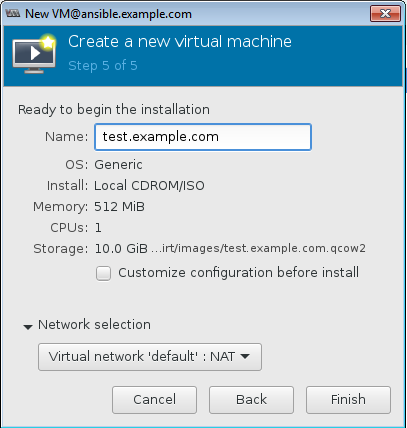
The Network allocation was as below, default NAT on the KVM Host was selected also the name was given as test.example.com as below
 |
| Create a New VM in Virt-Manager (6) Name and Default Network as NAT |
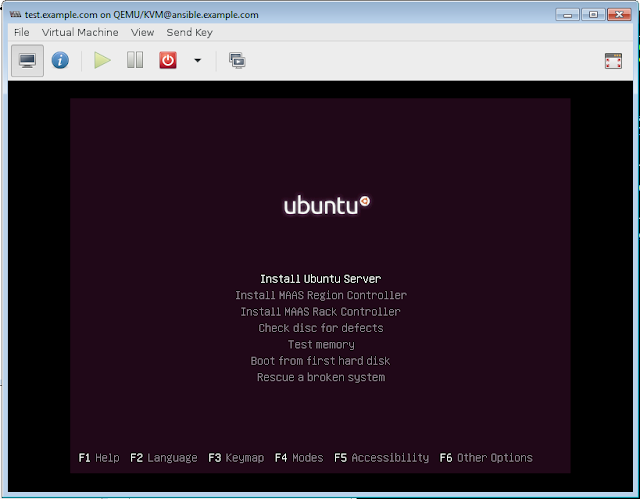
With "Finish" above the machine has booted in the First Ubuntu Install screen, here ESC key was pressed to begin the Ubuntu installation.
 |
| Create a New VM in Virt-Manager (7) Ubuntu Install screen |
Install Ubuntu server was selected. Here the details of the OS installation are being skipped to keep the document brief.
 |
| Create a New VM in Virt-Manager Select Install Ubuntu Server Installation |
The Ubuntu Installation progresses as below. Please follow the on screen prompts for the installation.
 |
| Create a New VM in Virt-Manager Ubuntu Installation Starts |
Seeing the network of the KVM VM. The machine has got an interface from the NAT hence it is having IP of the rage 192.168.122.xx also as the interface is NAT from the KVM Guest and further Bridged on the Windows VMWare WorkStation Hypervisor with the Windows host Wireless adapter connected to the internet, it can directly reach to the internet as can be seen that it can resolve the name of www.google.com using the DNS.
 |
| IP allocation and resolving google |
Further properties of the KVM VM Guest is as
 |
| KVM VM Overview properties |
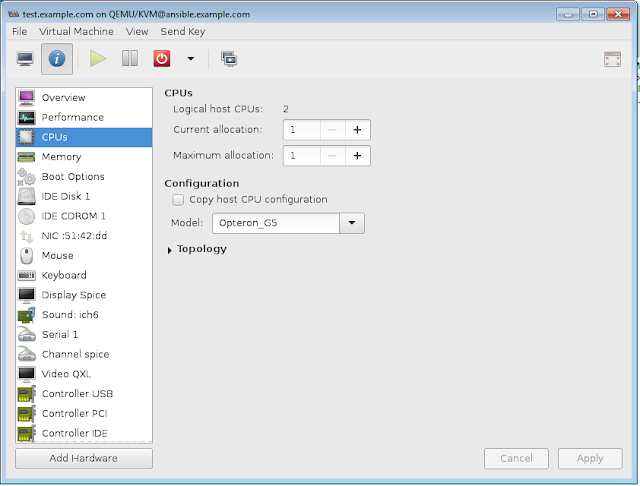
The CPU properties
 |
| KVM VM Overview properties CPU |
The Virtual Network Interface of the KVM VM Guest
 |
| KVM VM Guest Properties Network Interface |


